Hooq help centre
Connect two instances with pairing files
Goal
Connect two Jira Cloud instances so you can create a Hooq between them.
Before you start
- Call the two instances A and B. One person works on each.
- Do steps 6 to 10 in one go: a connector file is valid for only 5 minutes.
- You can have at most 5 unfinished connectors on an instance. See Resume or delete an unfinished connector.
Steps
Instance A. Open Hooq, select ... next to New Hooq, then Connectors.
You should see: the page Cross-Instance Connectors.Select New Connector.
You should see: a connector page with the status Draft and the tab Share your public key.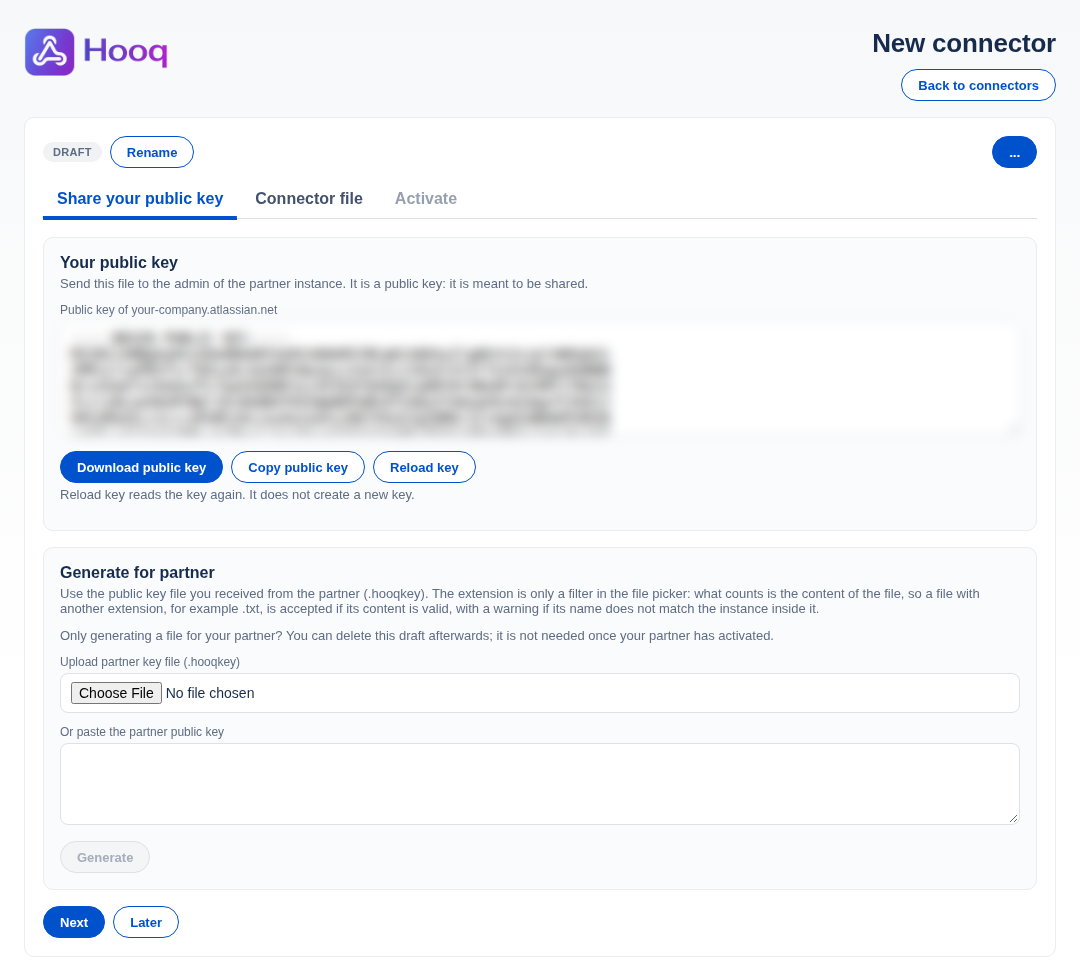
The first tab of a new connector. The public key is blurred in this picture.
Select Download public key.
You should see: a message like Downloaded your-company.hooqkey. Send this file to the admin of the partner instance.Send the file to the administrator of instance B. Then select Later to leave the draft for now.
Instance B. Open Connectors in the same way and select New Connector.
Under Generate for partner, select Choose File and pick the key file from A. Hooq shows which instance the file says it comes from. Then select Generate.
You should see: the message Connector code generated. and a Connector code box.Select Download connector file.
You should see: a file called likepartner-team-for-your-company.hooqconnector. You can select Copy connector code instead and send the text.Send the file to the administrator of A within 5 minutes.
Instance A. Open the draft from the list (select Open), or select Next if the page is still open. On the tab Connector file, upload the file from B.
You should see: the instance of B named under the field. If Hooq shows a warning, read it before you go on.Check the Connector name (Hooq suggests the partner's name) and select Save.
You should see: a message such as Connector <name> saved for the partner <instance>. Next step: press Activate to complete the handshake. The status is Pending and the Activate tab opens.On the Activate tab, select Activate.
You should see: the message Connector activated. and the status Active. The button now reads Reconnect.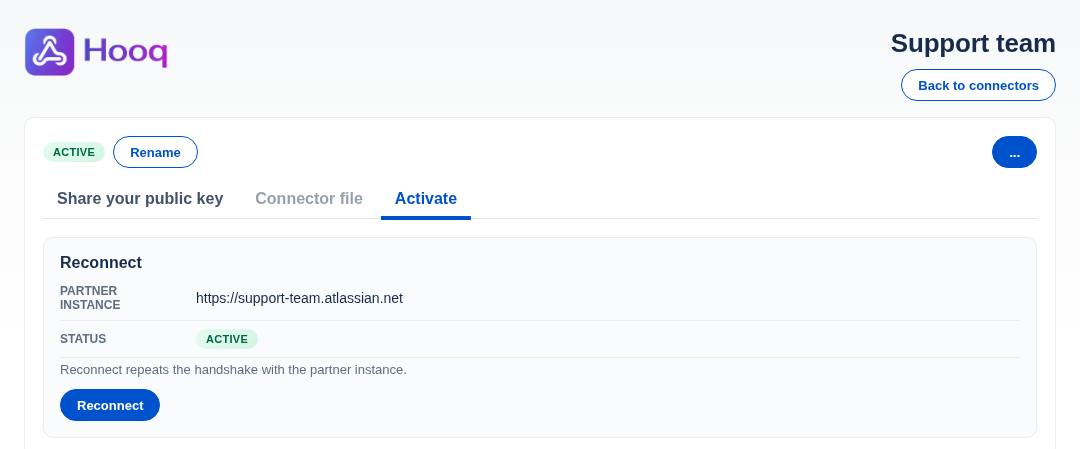
The Activate tab after the handshake.
Instance B. Open the Connectors page and select Reload if needed.
You should see: a new row for instance A with the status Active. You did not have to add anything on B.Instance B. Your draft from step 5 is not needed any more. Open its ... menu and select Delete, then Delete connector.
Expected result
Both instances show an Active connector for each other. You can now create a Hooq with another Cloud instance. See Create a Hooq.
Common mistakes
- Waiting more than 5 minutes between steps 6 and 10. Generate a new file on B.
- Connecting an instance that already has a connector. Hooq refuses it. Use Reconnect on the existing row.
- Pressing Activate after a warning that the file comes from another instance than you expect. Delete the connector instead.
- Running different versions of Hooq on the two instances.
Related pages
Want to raise a ticket? Click here (opens in a new tab)